ZMODO Zviewer for Android OS
1. Software Installation
1.1 Introduction
ZMODO Zviewer for Android is a mobile app used to stream live video from your ZMODO H.264 DVR or IP Network Camera, and supports a four channel simultaneous live view. This guide focuses on the installation and use of the application.
1.2 Requirements
Hardware: Android OS Mobile Phone
System: Android 2.2 and above
Network: WiFi or GPRS
1.3 Installation Steps
From your Android device: Access Google Play, and download Zviewer.
From a computer: Go to: https://play.google.com/store, and download Zviewer. Connect your phone to the computer, copy the contents of this file to your phone's SD card, and install as prompted.
2. Operation Instructions
2.1 Opening Program
Locate the Zviewer application and tap to launch. Once the application loads, you will see the main interface.
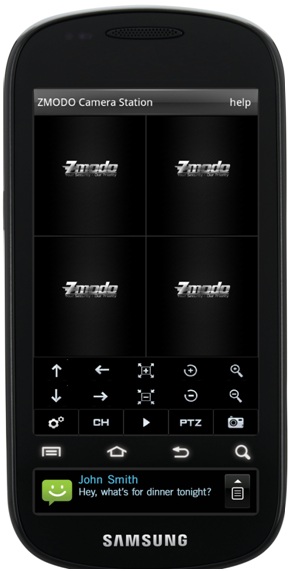
Start
2.2 Connecting to Device
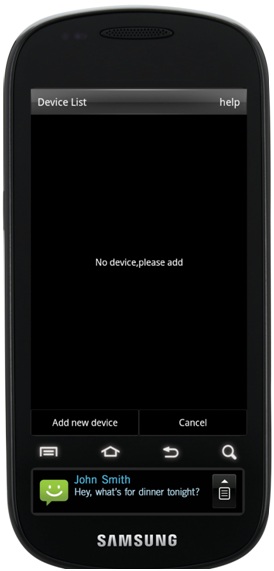
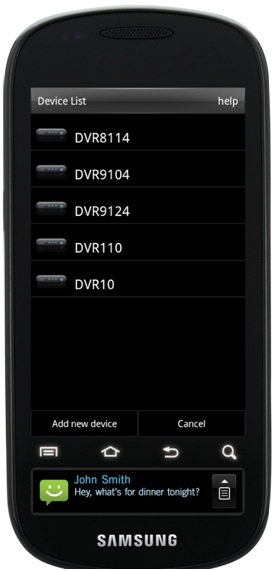
1) From the main interface, tap the SETTING button on the bottom left of the toolbar to enter the Device List interface;
2) If there are no devices added, you will be prompted with "No device, please add " (See No Device);
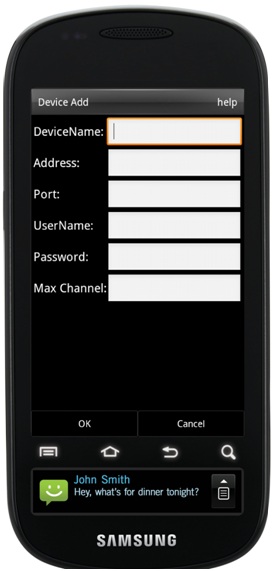
3) Tap ADD NEW DEVICE at the bottom to enter the device information;
4) Enter a name for the DVR, its IP address, port number, username, password, and number of channels, then tap OK to save your changes (See Device Add);
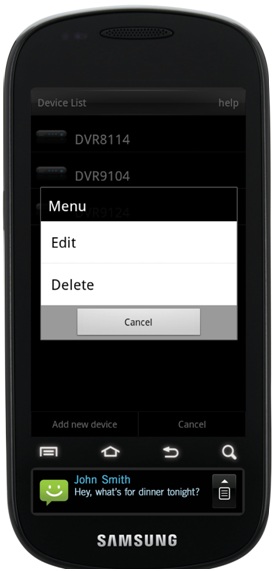
5) To delete or alter a device, long-press on the desired device (See Device Edit);
6) To return to the main page without making any changes, tap CANCEL.
No Device Device Add
Device Edit
2) If there are no devices added, you will be prompted with "No device, please add " (See No Device);
3) Tap ADD NEW DEVICE at the bottom to enter the device information;
4) Enter a name for the DVR, its IP address, port number, username, password, and number of channels, then tap OK to save your changes (See Device Add);
5) To delete or alter a device, long-press on the desired device (See Device Edit);
6) To return to the main page without making any changes, tap CANCEL.
No Device Device Add
Device Edit
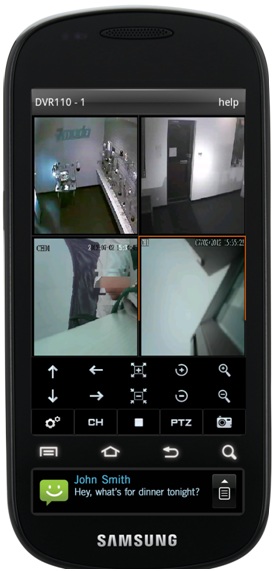
2.3 Playing Video
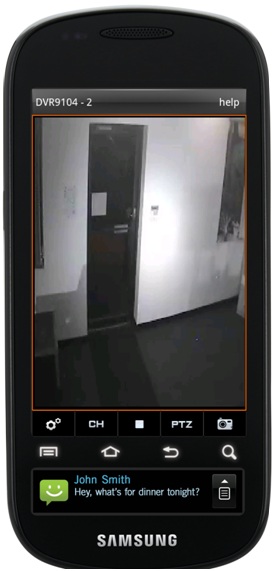
1) From the main page, tap any channel's play window; an orange order will surround the chosen channel;
2) Tap the START button at the bottom of the toolbar to play the video (See Play); if you see a pop-up prompt stating "please connect to devices", make sure you have followed all instructions listed in Sec 2.2;
3) To stop streaming, tap the STOP button at the bottom of the toolbar.
Play
2) Tap the START button at the bottom of the toolbar to play the video (See Play); if you see a pop-up prompt stating "please connect to devices", make sure you have followed all instructions listed in Sec 2.2;
3) To stop streaming, tap the STOP button at the bottom of the toolbar.
Play
2.4 Switching Devices
1) From the main page, tap the SETTING button on the bottom toolbar to enter the device list (See Device List), or long-press the channel you would like to change;
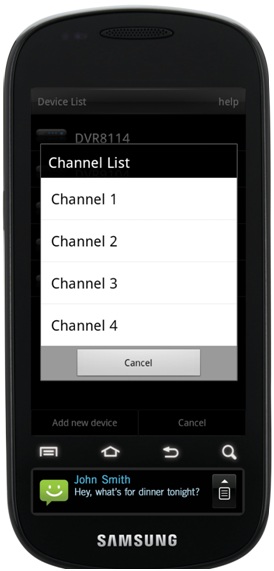
2) Tap on the desired DVR to open a pop-up channel list (See Channel List);
3) Tap on the desired channel from the pop-up channel list; the program will automatically switch back to the main page, and play this channel's video.
Device List Channel List
2) Tap on the desired DVR to open a pop-up channel list (See Channel List);
3) Tap on the desired channel from the pop-up channel list; the program will automatically switch back to the main page, and play this channel's video.
Device List Channel List
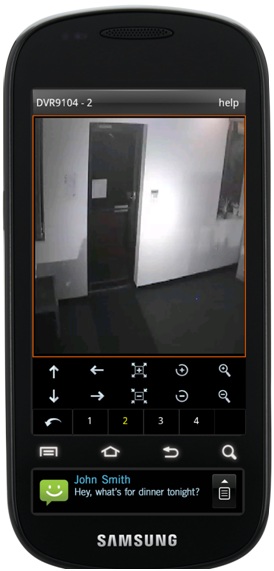
2.5 Switching Channels
1) With the desired screen selected with the orange outline, tap CH at the bottom of the toolbar to reveal the channel selection buttons (See Channel);
2) Select the channel you would like to play; swiping your finger across the bar will reveal additional channels;
3) Tap the RETURN button to hide the CH toolbar and return to the normal toolbar.
Channel
2) Select the channel you would like to play; swiping your finger across the bar will reveal additional channels;
3) Tap the RETURN button to hide the CH toolbar and return to the normal toolbar.
Channel
2.6 Switching Display Modes
1) Double tap the desired channel to switch between four channel views and single channel views;
2) Switch between portrait and landscape views by turning your phone horizontally or vertically (See Portrait, Landscape). When viewing in Landscape mode, all functional buttons will be hidden.

Portrait
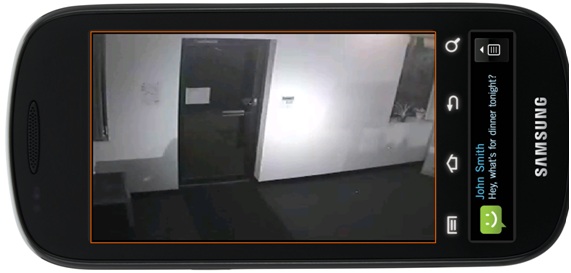
Landscape
2) Switch between portrait and landscape views by turning your phone horizontally or vertically (See Portrait, Landscape). When viewing in Landscape mode, all functional buttons will be hidden.
Portrait
Landscape
2.7 PTZ Control
1) Double tap on the channel you would like to control to maximize the screen;
2) To reveal the PTZ toolbar if it is not up already, tap PTZ (See PTZ);
3) On the top row, the buttons from left to right signify: tilt up, pan left, zoom in, aperture increase, focal length increase. On the bottom row, the buttons from left to right signify: tilt down, pan right, zoom out, aperture decrease, focal length decrease;
4) To hide the PTZ toolbar, tap PTZ.

PTZ
2) To reveal the PTZ toolbar if it is not up already, tap PTZ (See PTZ);
3) On the top row, the buttons from left to right signify: tilt up, pan left, zoom in, aperture increase, focal length increase. On the bottom row, the buttons from left to right signify: tilt down, pan right, zoom out, aperture decrease, focal length decrease;
4) To hide the PTZ toolbar, tap PTZ.
PTZ
2.8 Image Capture
In portrait mode, select a video, and tap the SCREENSHOT button at the bottom right corner of the toolbar. The file will save to the SD Card/zviewer directory.

Capture