This is a tutorial on how to connect DVRs with the SKU numbers SCN4, SCN8 and SEN6 to the General CMS software that came with the DVR units. If you have misplaced the disc, click here to download the software.
1. When you first open the software, there will be a warning that there is no device connected.
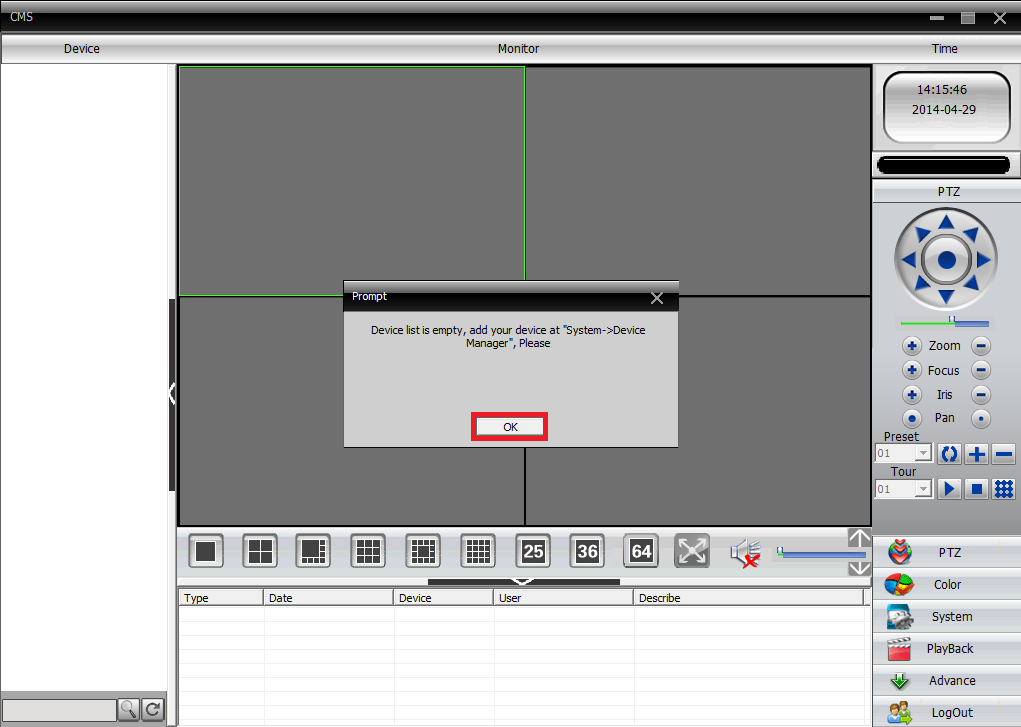
Click OK and then select the option for System as shown below.
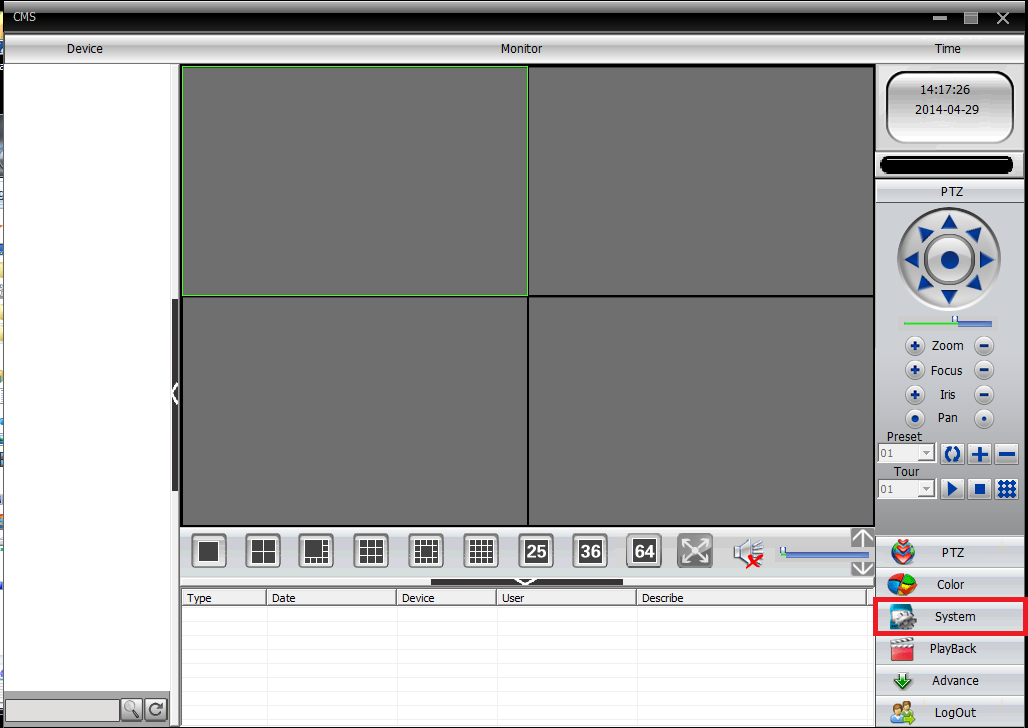
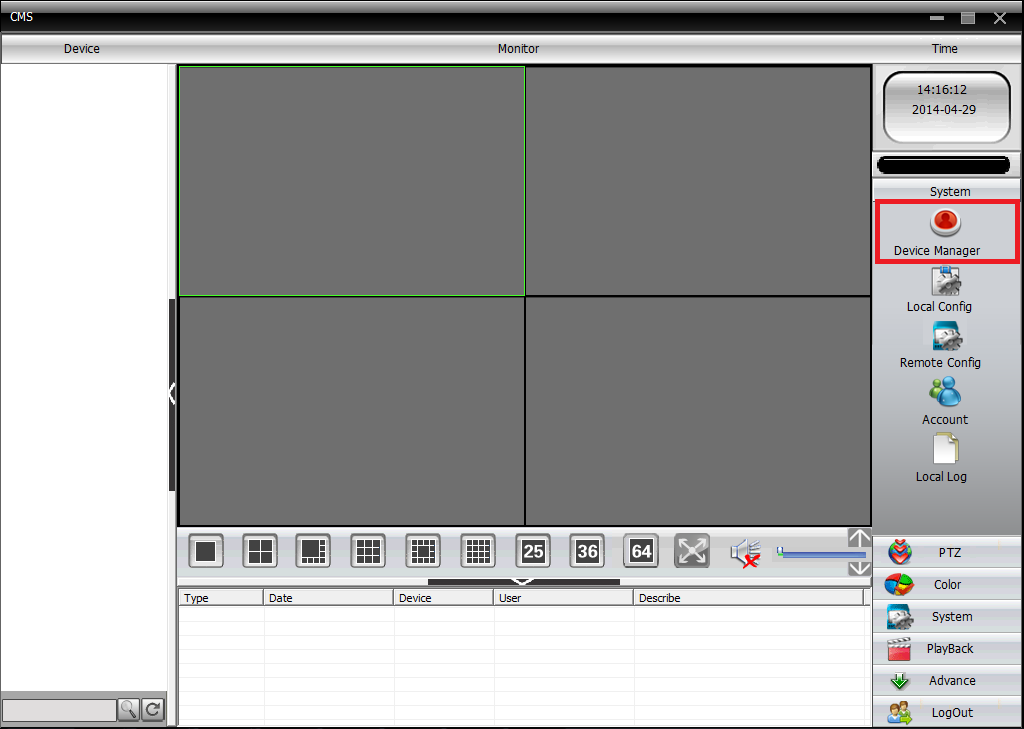
2. Select the option for Device Manager.
3. This should open up a new window. Select Add Area.
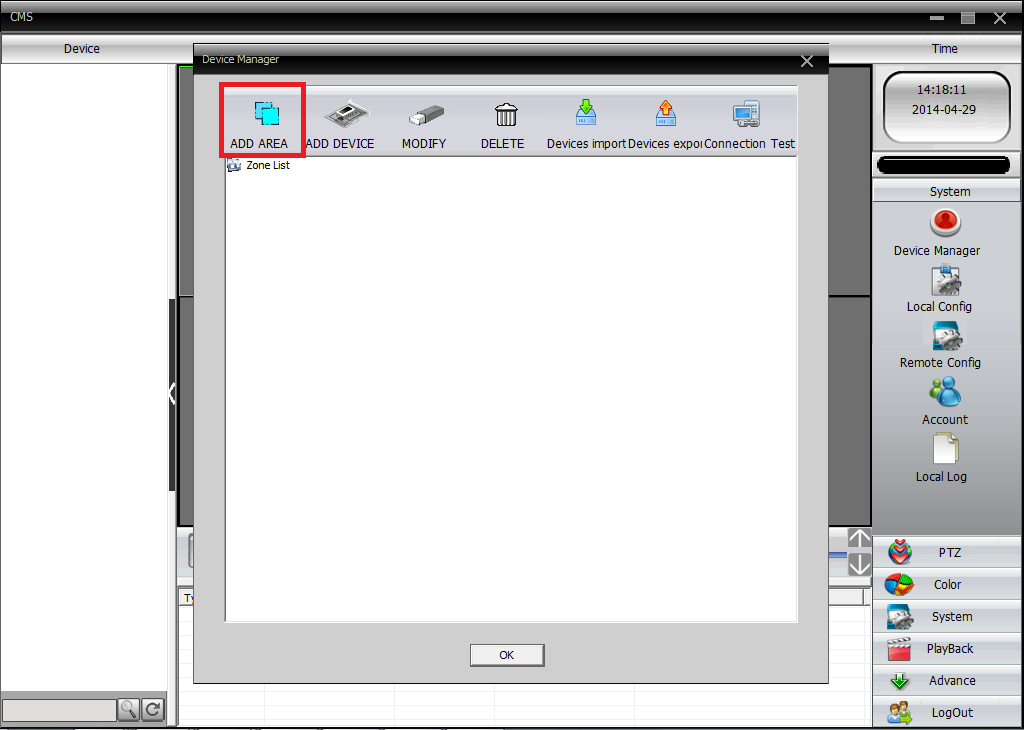
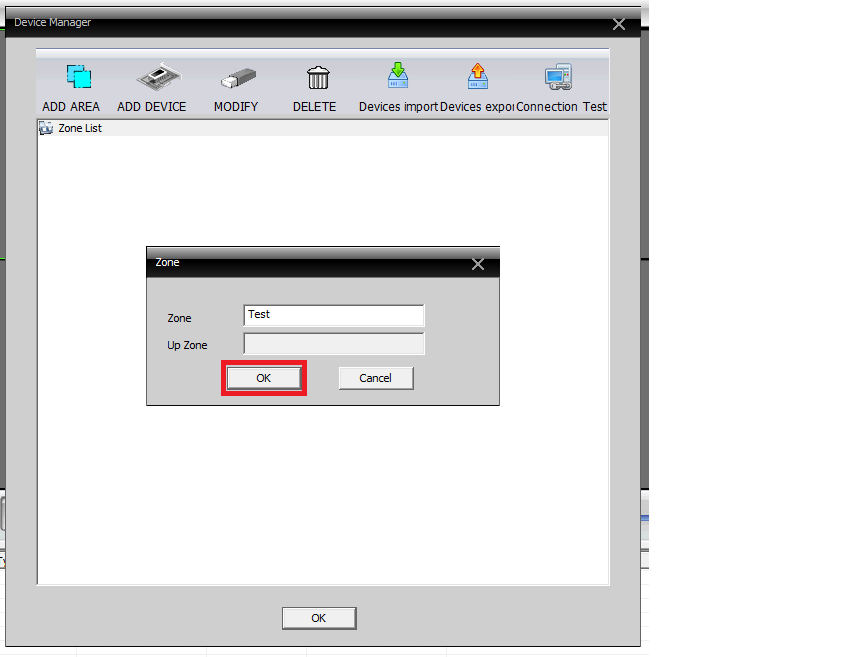
4. For the Zone enter a description of the location of the DVR, for example Home or Work. Then click OK. This is to help organize your DVRs if you have multiple DVRs in different locations.
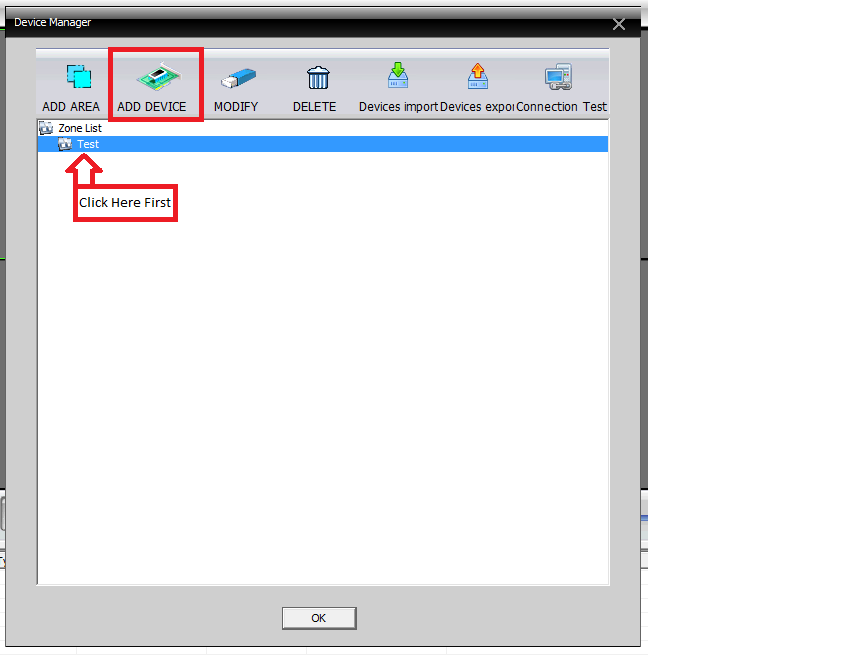
5.The zone you created will apear in the Zone List. Select the zone that you created, and then the option to Add Device will appear.
6. Before adding the new device, the DVR should already be setup for local or remote access. You will also need all the IP addresses, port numbers, and login information already setup on your DVR.
- Name: this can be whatever you like it to be
- IP Address:
- If you are on the same local network, you will use your local IP address that should be listed in the Network section on the DVR (Usually 192.168.x.x or 10.0.x.x)
- If you are away from the location, you will use your External or Public IP address.
- Port: By default it should be 34567, unless it has been changed on DVR's network settings
- Username/Password: This will be the username and password you use to access the DVR.
- It may be the administrator username and password for full privileges.
- It can aslo be a custom username and password that was created for specific users with limited access.
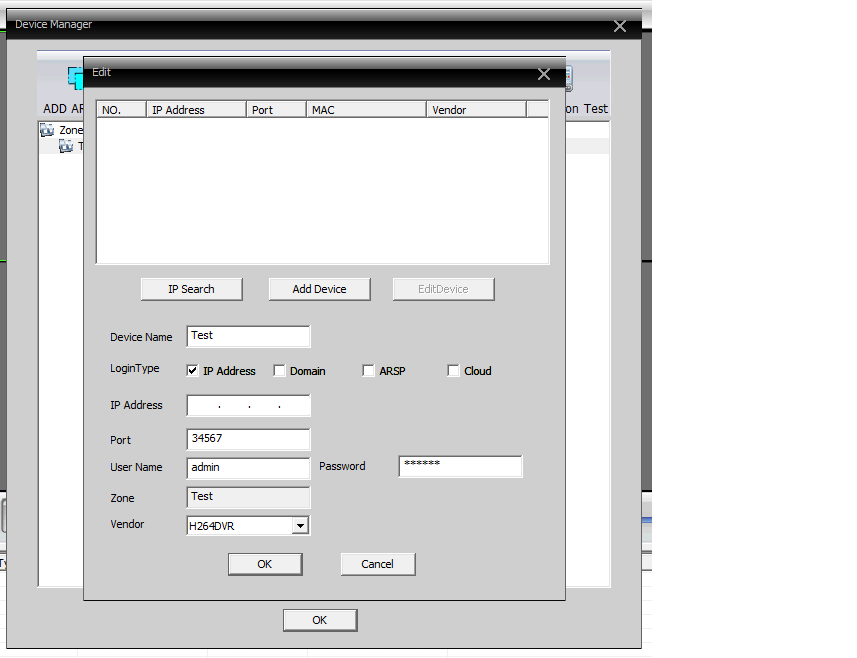
Once you have all that information filled out. Click OK and you should see your Device Name that you created listed underneath the Zone. Click OK again to go back to main screen.
7. You can now double-click on the Device Name listed under the Device List. You should see on the bottom that it says Connect Successful, and your camera channels will appear under the DVR Device Name.
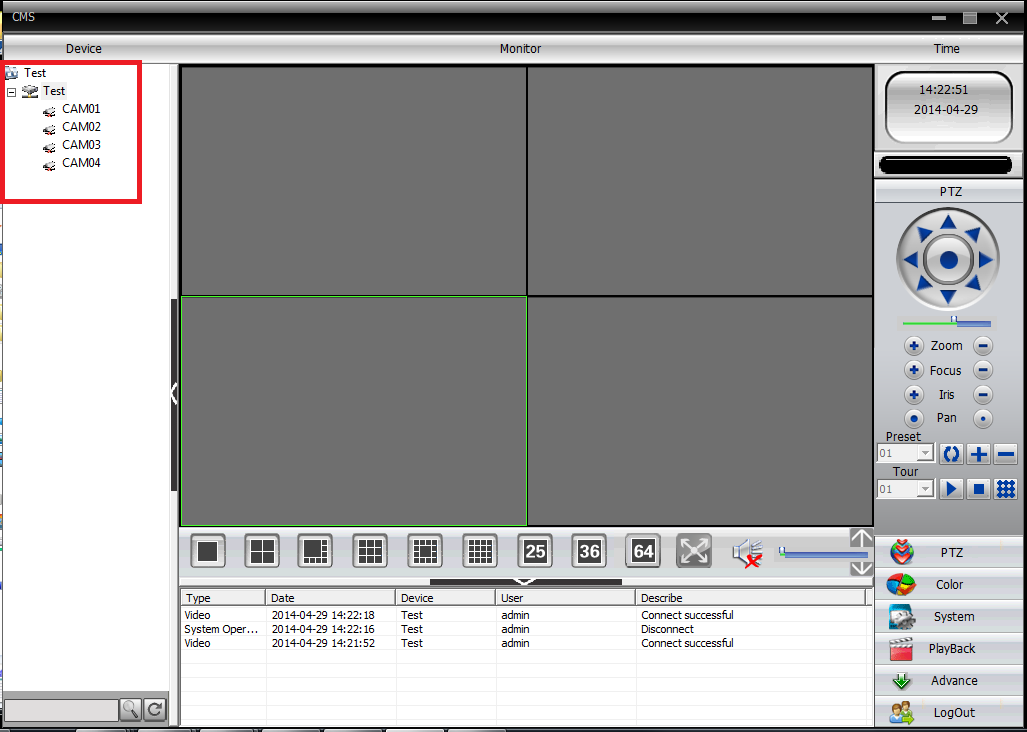
8. To connect to the cameras, right-click on the Device Name and select the option for Connect all Video.
- Choose the Main Stream if you are local or want higher quality video, but this may take longer to load.
- The Extra Stream will give you a smoother image with a lower quality image.
You can also open each channel individually by first selecting a window with the green outline. Then double-click on one of the channels, for example CAM01, and the channel will appear in that window. Repeat the process for the other channels.
Tags: Add Device, CMS, PC software, SCN4, SCN8, SEN6, Software