This article will explain how to back up video that was previously recorded on the SCN series DVR.
Note: Navigating the DVR's menu system is most easily accomplished using the mouse that came with the DVR.
Before starting you will need to insert your USB flashdrive or external Hard-Drive in to the DVR.
After having connected a monitor and your cameras to the DVR, and with it powered on, right click the mouse. You will see a toolbar at the bottom of the screen as shown below. Click on "Playback" and you will be prompted to log in. The DVR has no default password so you may just click log in if you have not changed it. After logging in right click your mouse one more time to return your toolbar along the bottom and select "Playback" one more time.

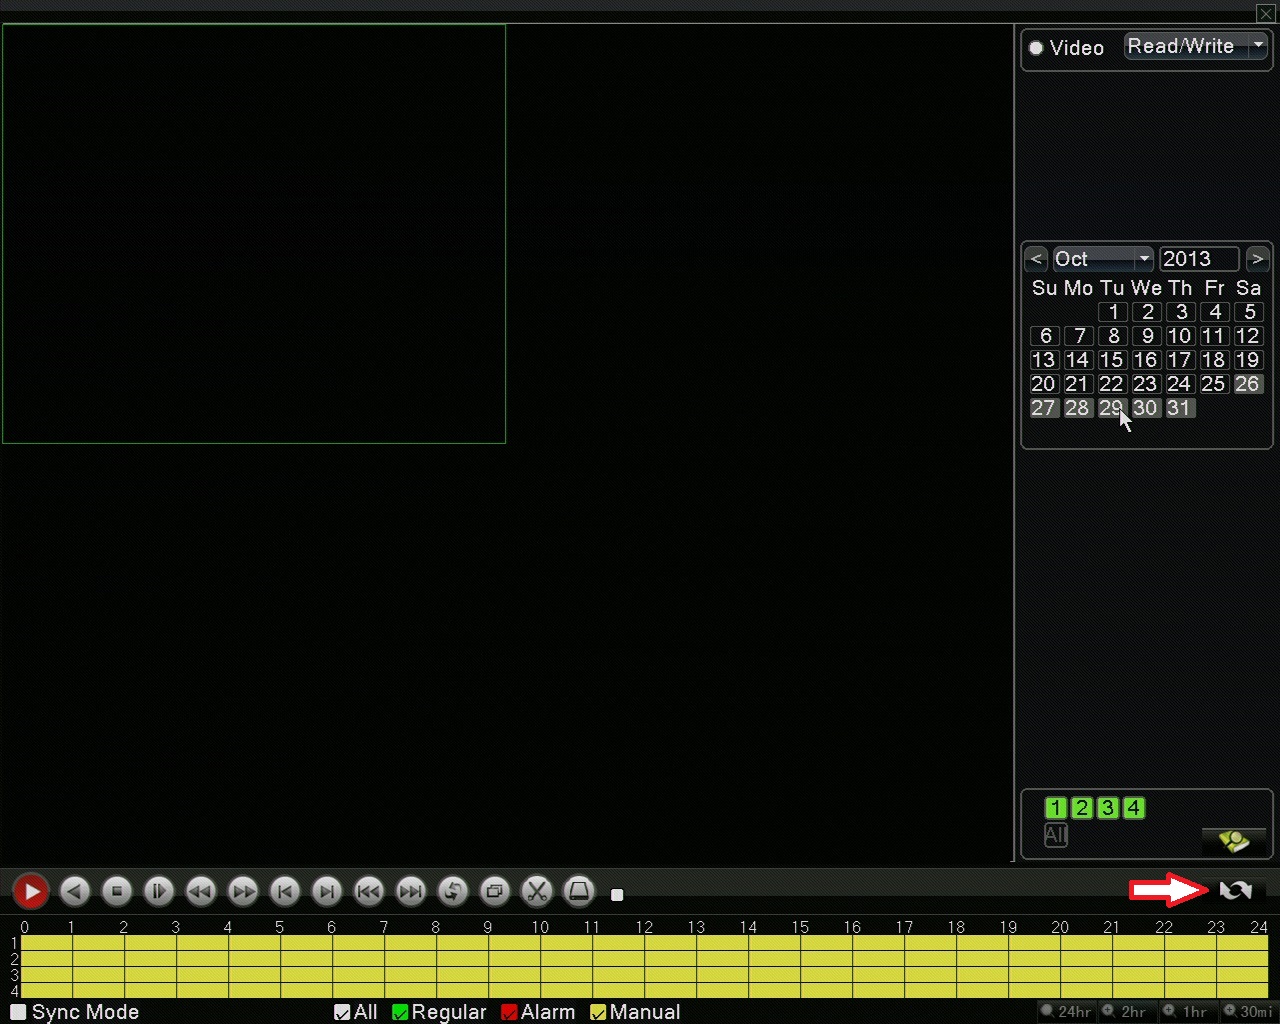
In the playback window that is now open you will first want to select which channels you would like to back up video from. They're listed in the lower right hand area. After marking which channels you would like to back up you will select the day you would like to back up in the calendar above the channel selection as shown below. Days that have recordings on them will be a lighter shade of gray then days without. Just click on the day you want and lastly you will press the circling arrows in the lower right also indicated below.
You will now have a timeline list of the days recordings. Put a check mark in any hour of the day you would like to back up, just be sure your flash-drive has the needed room available. When you select the hours you want you will see a "Backup" button appear directly above the circling arrows in the lower right(Shown below). Click this button.
You will be taken in to a window where you need to select the device you want to back up to. You should only have 1 USB storage device and it should be listed here. Put a checkmark in the box next to it and click "Backup"
You are now on the final step of backing up. In the window that has just opened(shown below) you should have listed all the files you want to back up. Before pressing start be sure to change the "Backup Format" type to "AVI" as that is what your computer will be able to read. Once you have you will click start. As you can see from the following pictures the backup can take a while. It takes roughly 10 minutes per gig of video you attempt to back up so keep this in mind when backing up large amounts of video.

When your backup finally finishes you will be given the message below. At this point you may hit OK and it will be safe to remove your USB device from the DVR. You have successfully backed up video from the DVR.
