The current version of ZViewer for PC Computers does not yet support motion detection recording, so we recommend using the free 3rd party software Genius Vision if you would like to set your Zmodo IP Camera to record when motion is detected.
Genius Vision can be downloaded safely from the manufacturer's website here: http://www.geniusvision.net/community.html
The complete PDF manual for Genius Vision can be downloaded safely from the manufacturer's website here: http://geniusvision.net/snapshot/GVUserManual.pdf
Once Genius Vision has been successfully downloaded and opened, please complete these steps to add an IP Camera to Genius Vision:
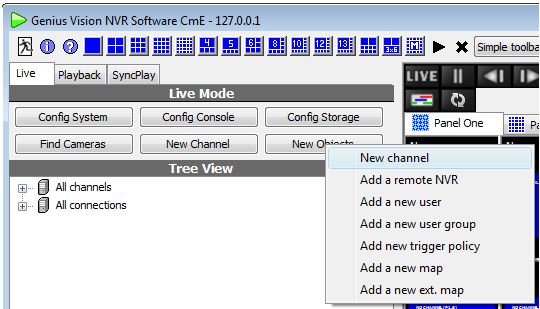
1) From the Main Menu, select New Objects > New Channel> Camera Setup.
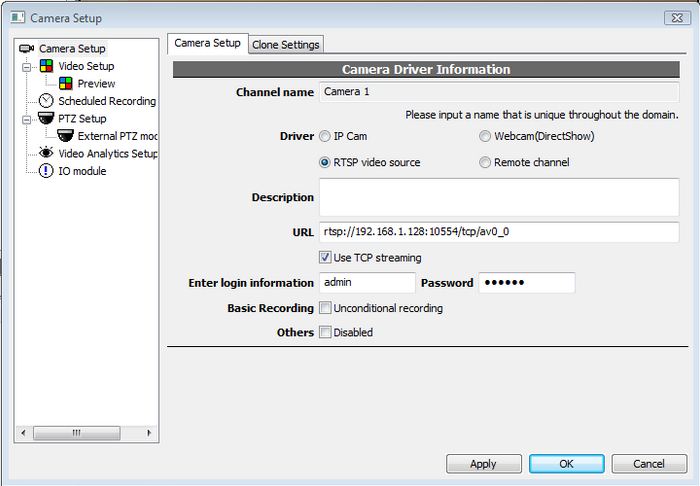
2) From the Camera Setup tab, select RTSP video source as the Driver.
3) Check the box labeled "Use TCP streaming."
4) In the URL field, enter the camera's RTSP url using this template:
The RTSP address of the main stream (720p) is:
rtsp://xxx.xxx.xxx.xxx:10554/tcp/av0_0
The RTSP address of the sub stream (VGA) is:
rtsp://xxx.xxx.xxx.xxx:10554/tcp/av0_1
("xxx.xxx.xxx.xxx" is the device's IP address as reported by the IPC Search tool.)
5) Enter the correct login and password for the camera into the login fields.
The end result will resemble this image:
6) Click "Apply" to save this camera to Genuis Vision. You should now see the video stream of your camera in the channel grid.
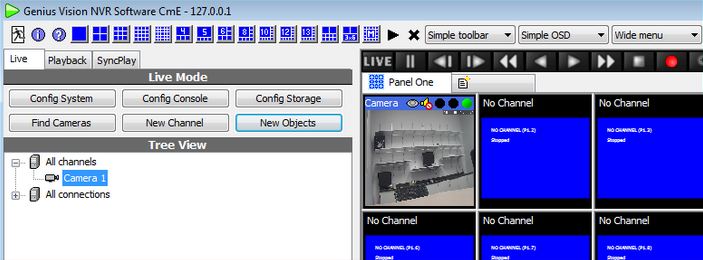
You can now repeat these steps if you would like to add any additional cameras to Genius Vision.
Genius Vision can easily be setup to record when motion is activated by any of the cameras that are configured on Genius Vision. Follow these directions to set up motion recording.
1) Click the "Config System" button.
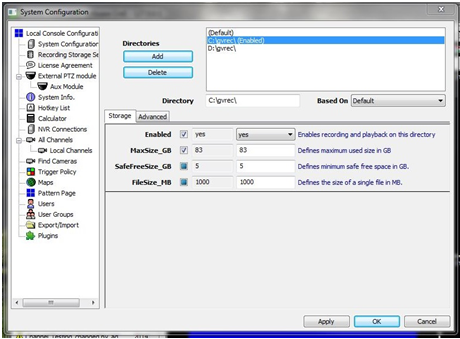
2) In the System Configuration window, select the “Recording Storage Setup” option.
In that menu, click the enabled box until it has a check mark.
Click the box next to MaxSize_GB and Specify the amount of space to make available for recording.
The default Directory is C:\gvrec\ you can change this in the directory window if you prefer the file to go to a different location.
Click Apply to save these settings.
3) Right-click on your camera image, and select Video Setup from the menu that appears.
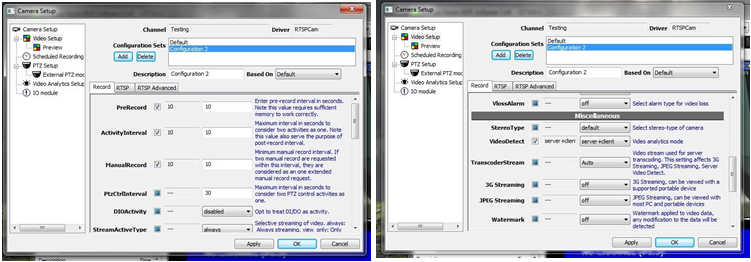
In the Camera Setup window, check the box next to PreRecord and ActivityInterval, then scroll down and check the box next to VideoDetect.
If you would like for the client software to flash red when motion is detected, you can also check the box next to ActivityAlarm.
4) After enableing the motion detection-based recording, create the region for motion detection. To do this, go to the Video Analytics Setup portion of the Camera Setup window. In that section click S-Motion, this adds an S-Motion bubble and indicator dot to the preview window.
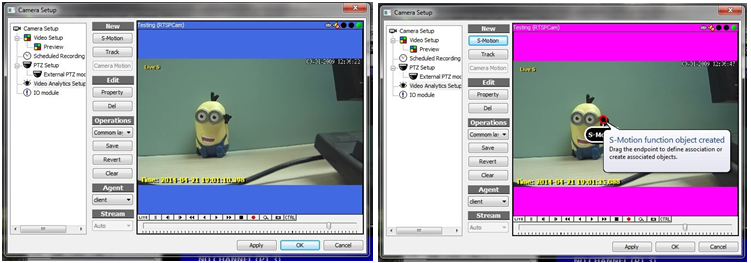
5) Click and drag the indicator dot to the desired area in the preview image. This opens a “Create definition of…” dropdown menu.
- Selecting "Region of interest" creates an area which is exclusively rectangular in shape, and can be move or resized as needed.
- Selecting "Region of interest(polygon)" creates a rectangular shape which can be modified to any polygonal shape by adding/removing vertices.
- Selecting "Object size" attempts to have the software determine the region based on the area the indicator dot was dragged to. This option is not recommended.
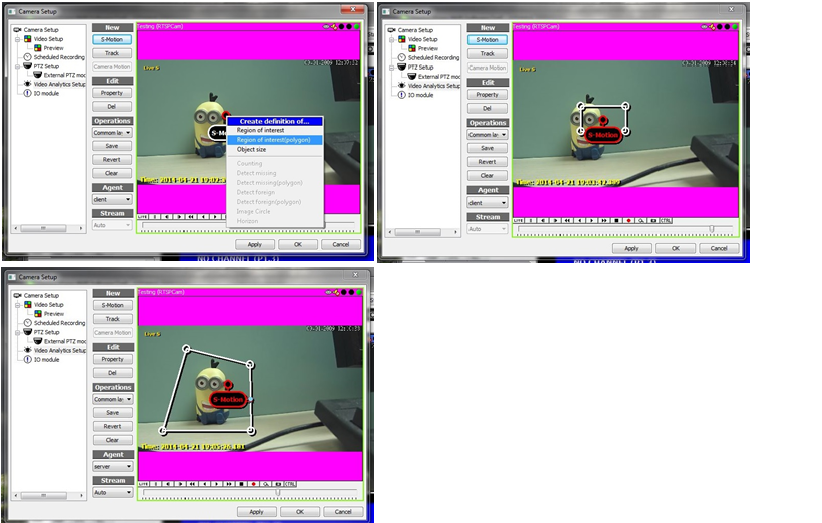
6) The Created area is where motion will be detected. Once set, click "Apply," and then "OK" to close the Camera Setup window.
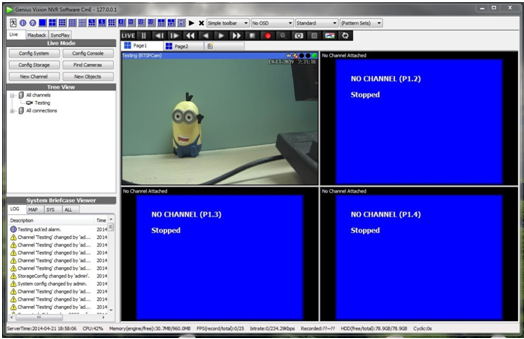
7) While motion detection is configured correctly, the camera icon under All channels should have an orange circle icon on it.
When motion is detected, and the channel is recording, the middle dot in the top of the camera screen will turn from black to red, and the camera icon under All channels will also turn red, as shown below.

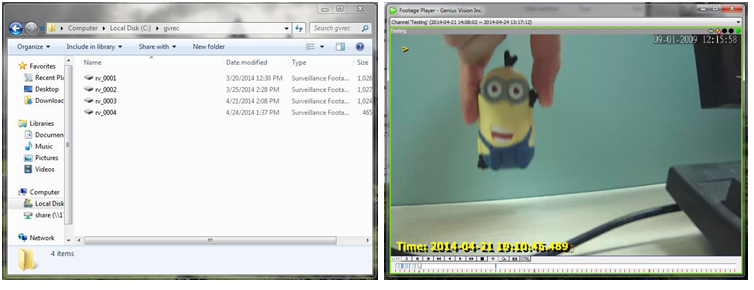
8) View recorded files sections in the drive previously specified (C:\gvrec\ by default). Once in the folder, double click on the surveillance footage file desired from the list.
Each file will record about 1GB of footage before a new file is created. Depending on the frequency of recording, files can span a longer or shorter period of time. Once you double click, the footage automatically opens in the Genius Vision playback software and can be played back from there.
Tags: 3rd party, Genius, Genius Vision, IP Camera, iSpy, motion detection, motion recording, RTSP