Before troubleshooting, please make sure to have your NVR and Windows Computer connected through an Ethernet cable to the router.
If you are having trouble accessing your NVR through its IP Address on the Internet Explorer, please do the following:
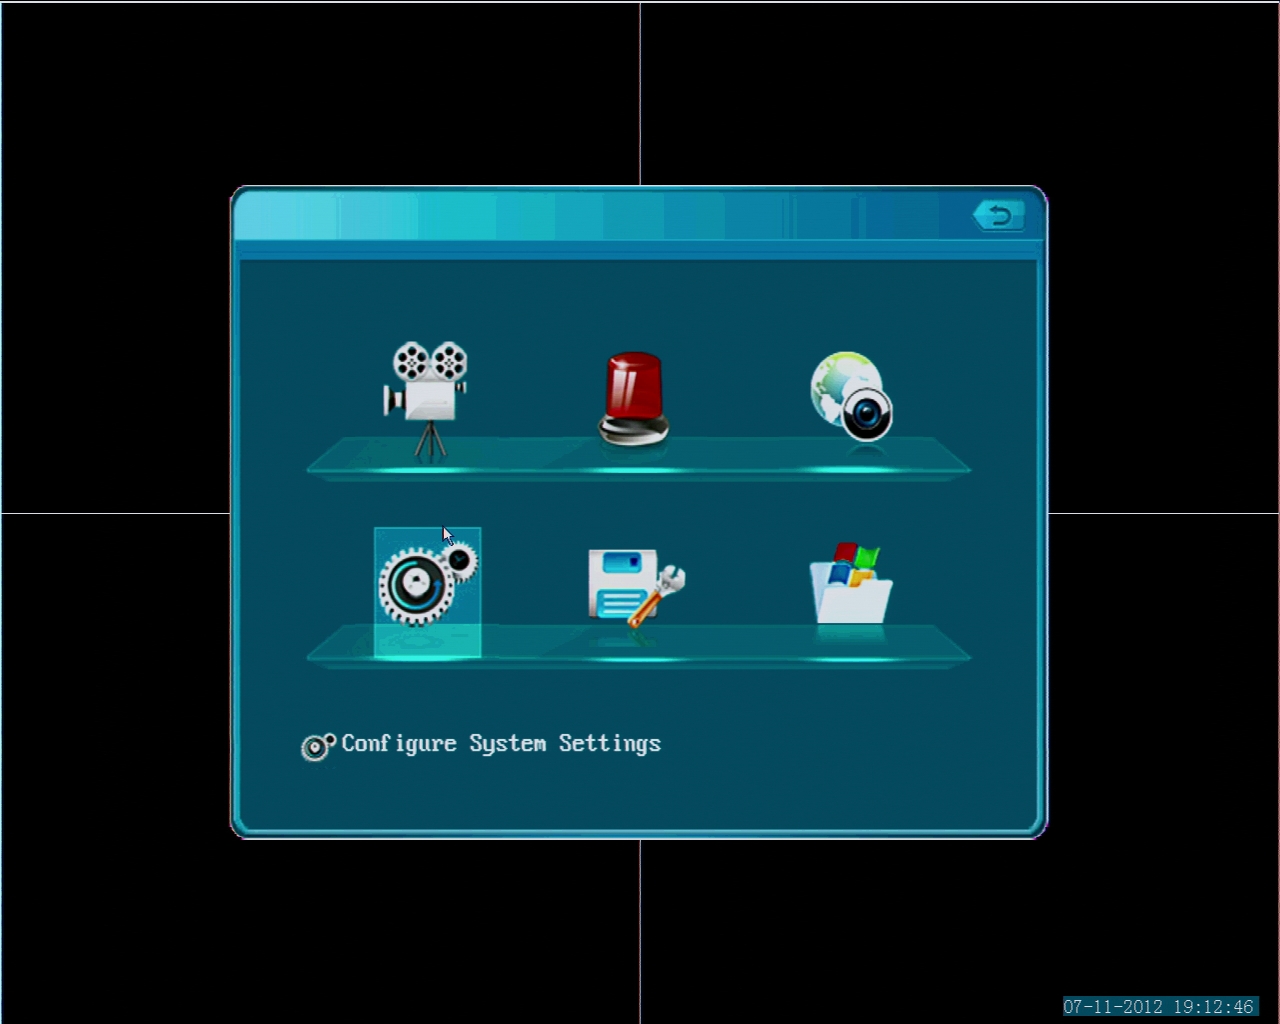
Enabling DHCP in the NVR: Right click on the screen you have connected directly to your NVR, and click on the option labeled "Main Menu”

Click on "Configure System Settings”

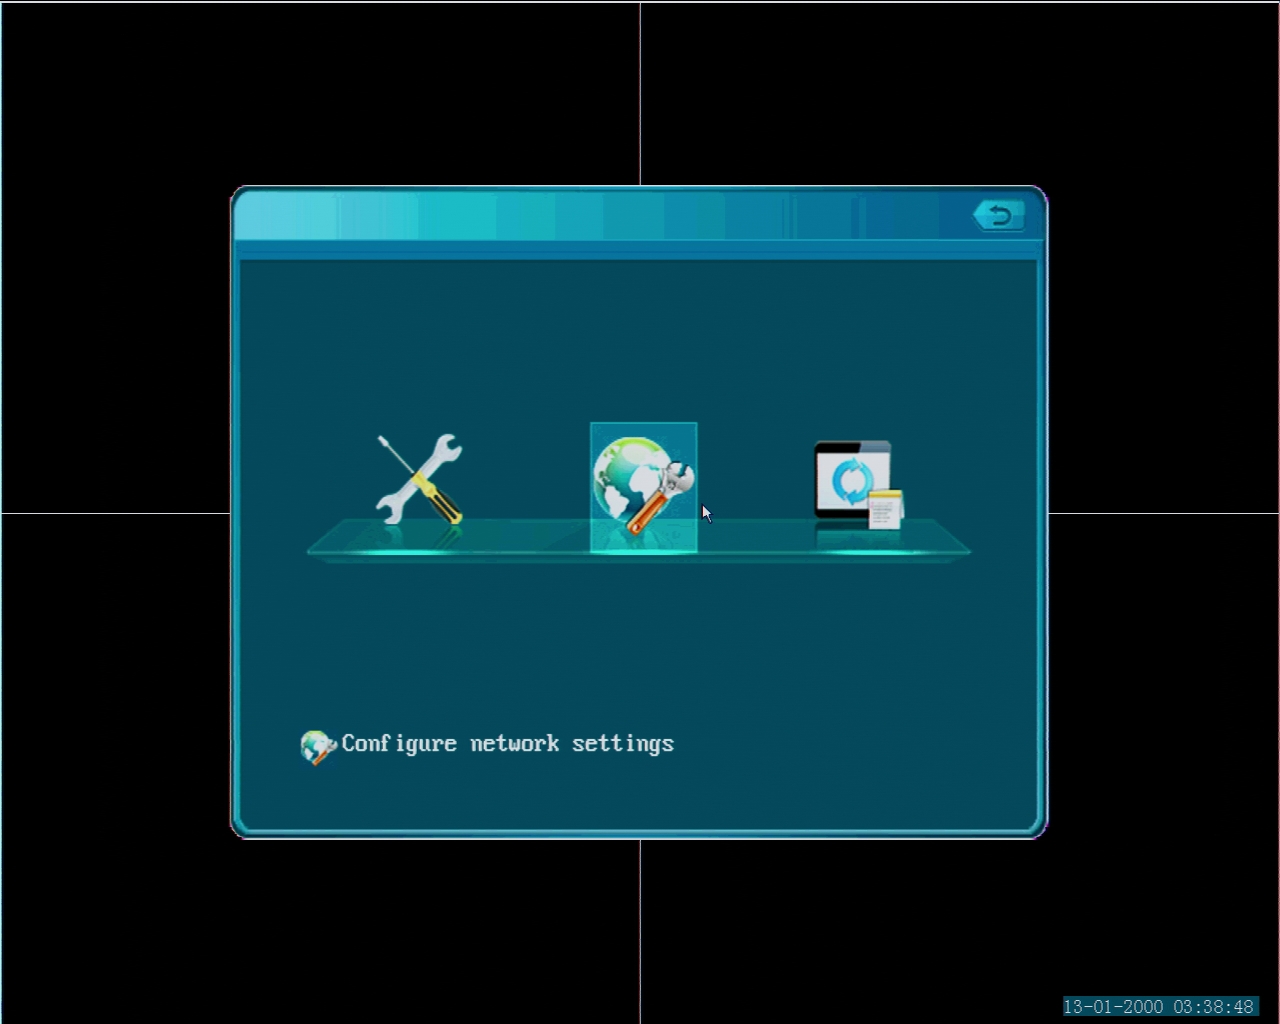
Select the middle option labeled "Configure Network settings”

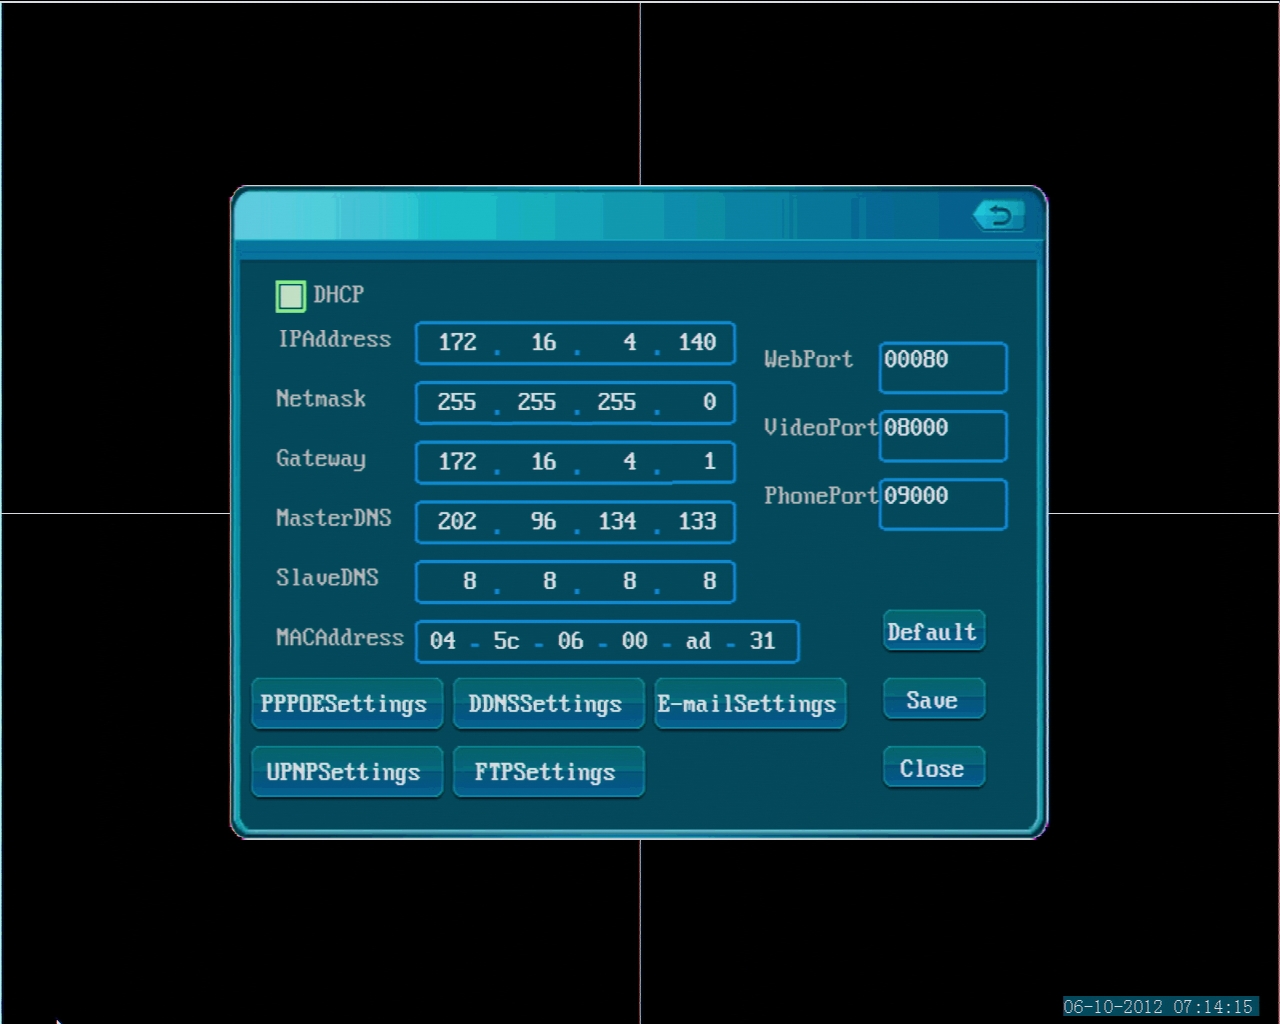
Proceed to enable the option "DHCP” up on the top of your network menu (white box= on, blue box= off). Save the settings.
Unplug the power from your NVR system, wait 5 seconds and plug it back in.
Once it's back up, go back to the Network menu you were working on. Take a look at the IP Address and write it down.

Go to your Windows Computer, open the IPC Search Tool, hit refresh and confirm that the IP Address shown next to "ZMD-NV-SBN4” is the same as the one you wrote down.
Proceed to access your NVR system again on the Internet Explorer. Type in the new IP Address of the NVR in the address bar and hit Enter. If the loading circle spins for more than 10 seconds with no result, open a new tab next to that one and retry it.
Changing the WebPort on the NVR: If you get no response after several attempts, we are going to proceed to change the WebPort on your NVR. Go to the network menu of your system, and change the WebPort from "00080” to "01025”, and save it. Reboot your system.

When it is back up, go to the network menu again and write down the new IP Address.
This time, input that address in your Internet Explorer followed by a :1025 at the end. (e.g http://172.16.4.157:1025)
If it still fails to connect, repeat this procedure with a new Ethernet Cable as it is likely to be defective.
Tags: access, ActiveX