Advanced Motion Recording Settings
If the motion detection on your DVR seems to be too sensitive or recording incorrectly, this article will explain the more advanced motion options.
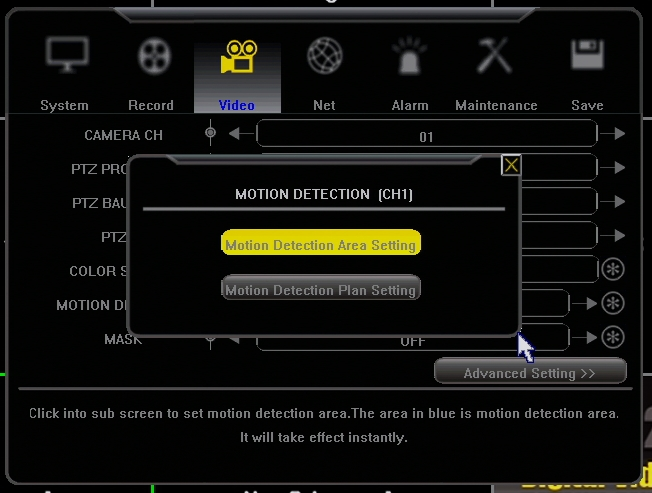
Click on the asterisk next to the "Motion Detection" setting under "Video" and you will be presented with this box:
Motion Detection Area Setting
Clicking on "Motion Detection Area Setting" will give you a grid that allows you to select areas of detection. The blue boxes are the areas that your camera will detect motion. This is helpful if one part of your camera views a busy street. You can tell the camera to ignore any motion in that part of the screen.
Right-click to go back one page.

Motion Detection Plan Setting
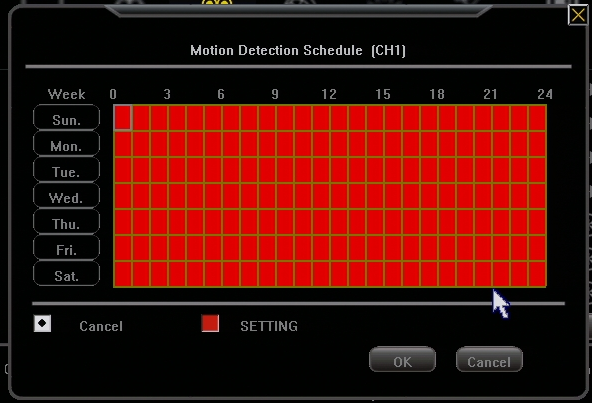
Clicking on "Motion Detection Plan Setting" will give you a schedule that you can choose to have motion detection active.
Red boxes mean the DVR will detect motion in that time, and white boxes mean it will not.
Note that this is done on a channel by channel basis. The picture below is changing the schedule for only camera 1.
Motion Handling Settings
Under "Advanced Settings" in the "Video" section, there is an item labeled "Motion Handling".
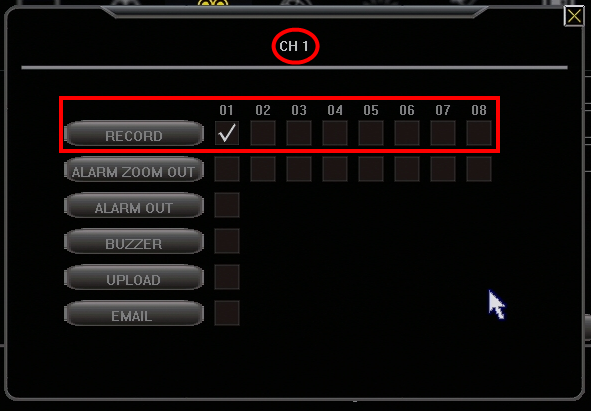
This setting is what the DVR will do when motion is detected. This setting is also done on a channel by channel basis. The picture below is only for CH1. The settings configured below will have the DVR record on CH1 when motion is detected on CH1. If ALL the record check boxes were checked, the DVR would be recording on all 8 channels when motion is detected in CH1.
With these settings configured properly, you can have your DVR recording in specific time frames on motion detected in specific locations of your video feed.
Tags: advanced, detection, motion, schedule, settings


