These instructions will show you how to backup previously recorded video on the SBN and SAN series DVR's.
Note: Navigating through the DVR is most easily accomplished with the mouse that came with it.
After the DVR has booted up right click the mouse in order to log in. The default password is either 111111 or 888888.
After logging in right click the mouse 2 times to bring up the toolbar along the bottom. From this toolbar we will select the "Record Search" option. It will appear as an
arrow pointing to the right(the play symbol).
We are now in the playback screen. It is important to note here that, although the current days recordings are automatically populated in the grid, any time you adjust the
date at the top you must click the search button at the bottom in order to populate that new day. If you do not you will just receive a failed search message.
(NOTE: Another important point is that the date you see at the top of the page when first going in is the date the DVR is set to. If you want to backup yesterdays footage you must do so based on the date and time the DVR recorded that footage as, not necessarily as the current days date.)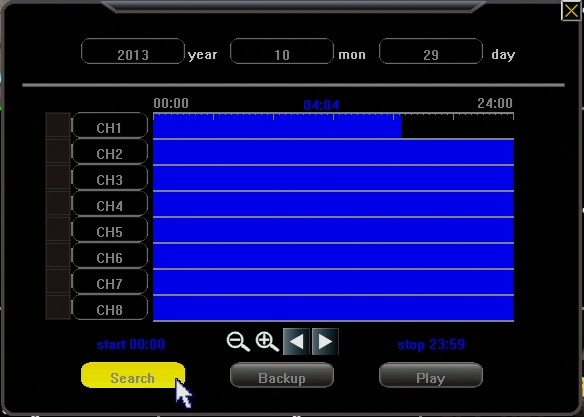
After the desired day has been set and you have clicked search, the grid in the middle will have the video for that 24 hour period loaded in to it. From left to right the grid
goes from midnight(start of day) to midnight(end of day). The horizontal bars are broken down by channel. In order to see video footage you will select a start and a stop
point on the grid as shown below. Be sure to put a checkmark in the box of the channels on the left you wish to backup. Only after doing all of this, press the "Backup" button.
*NOTE: If at this point you receive a "No Device Attached" error see remarks at bottom of article.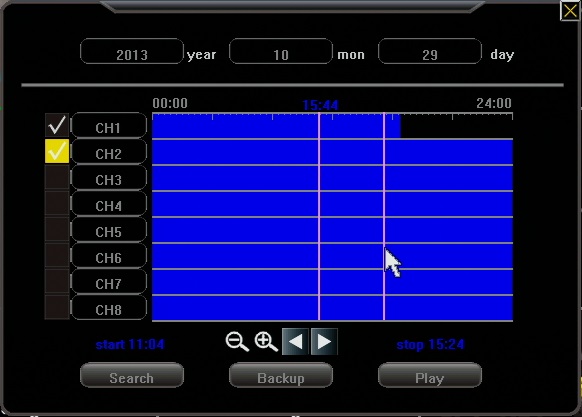
After clicking "backup" a window will be displayed giving you the final options before backing up your footage. The most important thing you will want to do here is adjust the file type to "AVI" as shown below. This will allow all Vista and newer windows computers to play the file through windows media player. If you are on an older version of windows you will want to download VLC media player in order to play back the footage on a computer. Finally click "backup" and your footage will be copied to your USB flash drive.
*No Device Attached - If you receive this message while having a USB device connected to the DVR while trying to back up it means that your USB drive is currently trying to use more power than the DVR has available at that USB port. This is sometimes seen with newer flash drives that use more electricity to run, or drives with LED lights that light up on them. It is recommended you use as basic of a flash drive as you have available. If you don't have another drive available at the moment you can attempt to unplug the mouse and use the remote control instead. Doing this stops the DVR from powering the mouse and will sometimes allow it to recognize the flash drive.
Tags: backup, video