Automatically Assign an IP address in to the DVR
All Zmodo DVR's have the capability of automatically assigning an IP address as long as the unit is connected to a router with an ethernet cord.
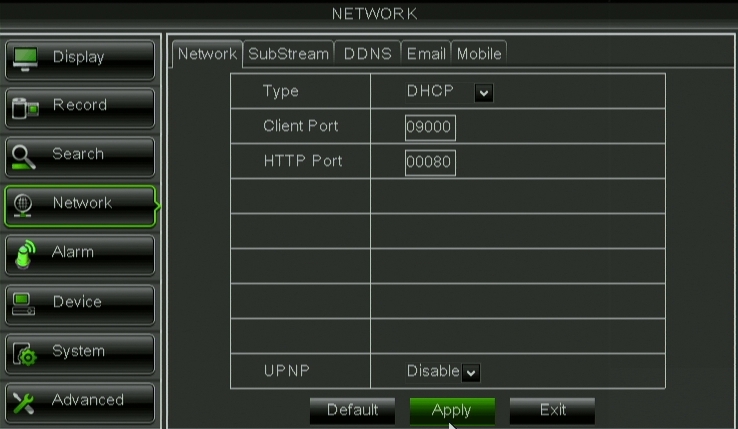
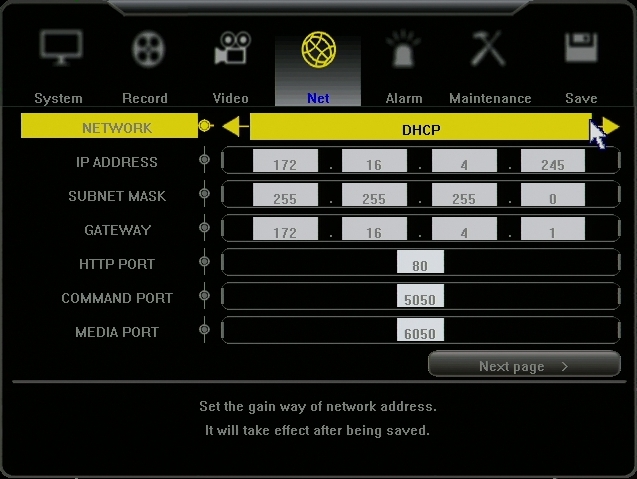
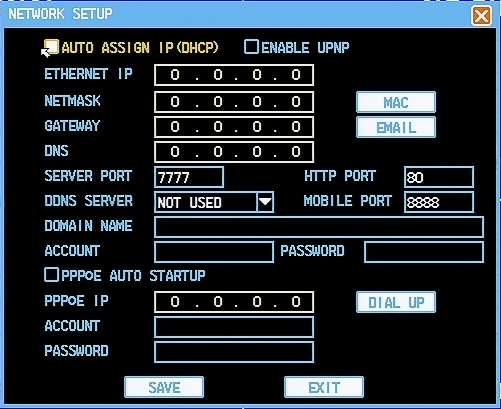
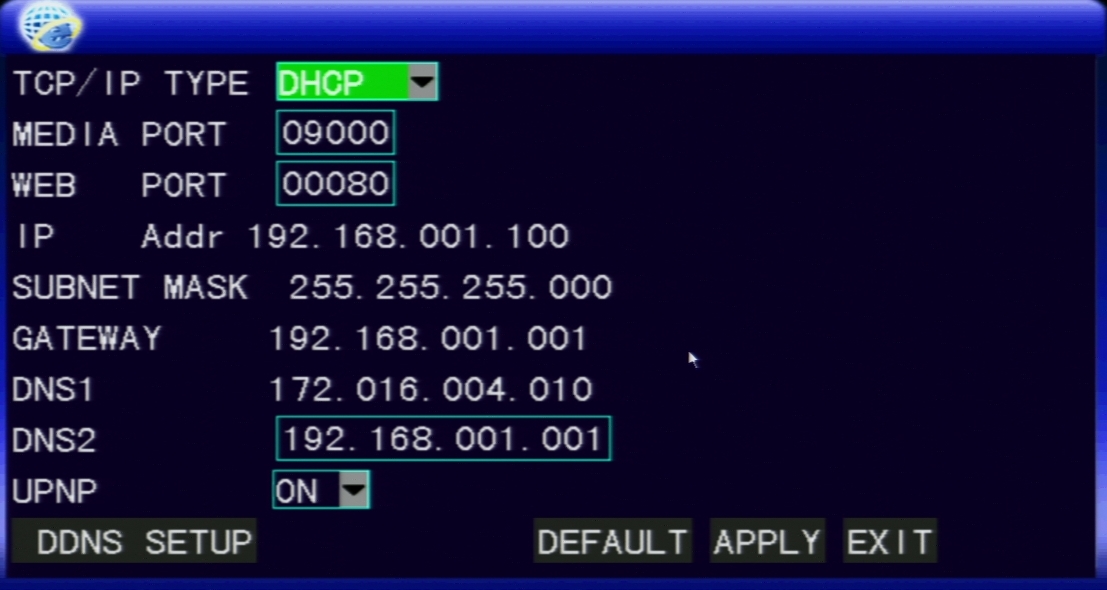
1) To auto assign an IP address in your DVR, access the Main Menu and go in to the Network Settings.
Select DHCP (auto assign IP) and select Apply. Restart the system after the setting has been saved.
Examples:
H9104V, H9108V, H9116UVDH

H9114V, H9118V

H8114V, H8118UV

H9124V

2) Once the DVR boots back up, go back in to the Network Settings and write down the IP address, Gateway (router's IP), and all port numbers. Keep this information for the Remote Network Setup.
Checking Your Connection
3) Make sure the router is powered on.
4) Make sure the light on the router port that the ethernet cable is connected to is on.
5) Make sure the light on the DVR port is on.
6) Configure Internet Explorer on the computer that is connected to the router that the DVR is connected to using the procedures on this link: HERE
7) Open Internet Explorer and enter the IP address of the DVR, to make sure you can see the login screen. If you can, your DVR is successfully communicating with your router.
8) After the confirming your connection, go back in to the Network Settings and change the Type back from DHCP to Static. Add 20 to the last set of digits in the IP address. Input this new IP address, Gateway (router's IP), and all port numbers. Save the settings and restart the DVR. This needs to be set to Static, otherwise, if your power goes out, your DVR may end up with a different IP address than the one that we will forward later on.
Your DVR can now be viewed over your local network.
To view your DVR from outside of your local network visit the Remote Network Setup: HERE
